Step-by-Step Guide

1. What is Middleware?
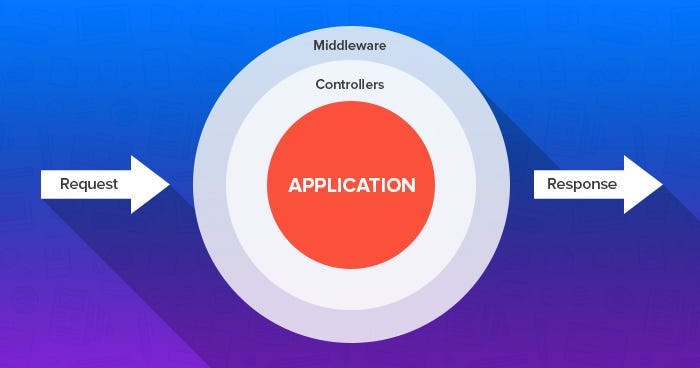
Middleware acts as a bridge between a request and a response. It is used to filter HTTP requests before they reach your application’s routes. Laravel’s default middleware includes tasks like checking for authenticated users or redirecting non-authenticated users.
2. Creating Middleware:
To create custom middleware, use the following Artisan command:
php artisan make:middleware CheckRoleThis command creates a middleware file in the app/Http/Middleware directory named CheckRole.php.
3. Implementing Logic in Middleware:
Open the CheckRole.php file and add your custom logic:
<?php

namespace App\Http\Middleware;

use Closure;
use Illuminate\Support\Facades\Auth;

class CheckRole
{
    /**
     * Handle an incoming request.
     *
     * @param  \Illuminate\Http\Request  $request
     * @param  \Closure  $next
     * @return mixed
     */
    public function handle($request, Closure $next)
    {
        // Redirect if the user is not an admin
        if (Auth::check() && Auth::user()->role !== 'admin') {
            return redirect('/unauthorized');
        }

        // Proceed to the next middleware or route
        return $next($request);
    }
}
In this example, the middleware checks if the authenticated user has the role of “admin.” If not, it redirects them to an unauthorized page.
4. Registering Middleware:
You must register the middleware before using it in your routes. Open the app/Http/Kernel.php file and add your middleware:
protected $routeMiddleware = [
    'checkrole' => \App\Http\Middleware\CheckRole::class,
];
This allows you to use the checkrole middleware in your routes.
5. Applying Middleware to Routes:
You can apply the middleware to individual routes or groups of routes in the web.php file:
Route::get('/admin', function () {
})->middleware('checkrole');
You can also apply middleware to a group of routes:
Route::middleware(['checkrole'])->group(function () {
    Route::get('/admin', function () {
        // Admin dashboard
    });
    Route::get('/admin/settings', function () {
       // Admin settings<
    });
});
6. Testing Your Middleware:
Once everything is set up, test your middleware by logging in with different user roles and trying to access the protected routes.
7. Middleware Parameters:
You can pass additional parameters to middleware. For example:
Route::get('/dashboard', function () {
    // Dashboard logic
})->middleware('checkrole:admin');
In your middleware, you can access the parameters like this:
public function handle($request, Closure $next, $role)
{
    if (Auth::check() && Auth::user()->role !== $role) {
        return redirect('/unauthorized');
    }

    return $next($request);
}
8. Common Use Cases for Middleware:
- Authentication Checks: Ensure users are logged in.
- Role-Based Access Control: Restrict access based on user roles.
- Logging Requests: Log every request made to your application.
- Input Sanitization: Modify request data before passing it to the controller.
Conclusion:
Creating and using middleware in Laravel is essential for managing request flow and applying conditional logic to routes. With custom middleware, you can build flexible and secure web applications by filtering requests efficiently.


